
I came across a wonderful volunteer at my workplace who found out I write a food blog. She asked if I wanted a sourdough starter. Of course I’ve been looking for a sourdough starter for a while and I was ready to take care of one. Her sourdough starter was a Carl Griffith 1847 Oregan Trail Sourdough starter (for more information about it check out carlsfriends.net). She also provided me with some information on how to take of one. I was really lucky to come across this awesome opportunity.

A sourdough starter contains living yeast and live bacteria called lactobacilli. It gets its sour taste because of the lactic acid produced by this bacteria. Because of the living organisms in the jar, the starter should be feed at least once a week for a healthy starter. Most starters can survive “starvation” for a couple of weeks but may need coaxing to get it healthy enough to bake with. As this is my first starter, I am still experimenting with flours and recipes. Breadtopia (www.breadtopia.com/sourdough-starter-management/) shows you in more detail on how to manage a starter.

Sourdough takes a long to make since you cannot use your starter straight from the fridge. You will have to feed your starter twice to get it to the right amount for your recipe. I use boiled filtered room temperature water to feed my starter. Whenever you feed your starter, feed it the same amount of bread flour to double it. For example, if you have 1/4 cup starter, feed it 1/4 cup bread flour with 3-4 tablespoons of water. Let the starter sit at room temperature until it has doubled in size which should be 4-8 hours. You should now have 1/2 cup starter.

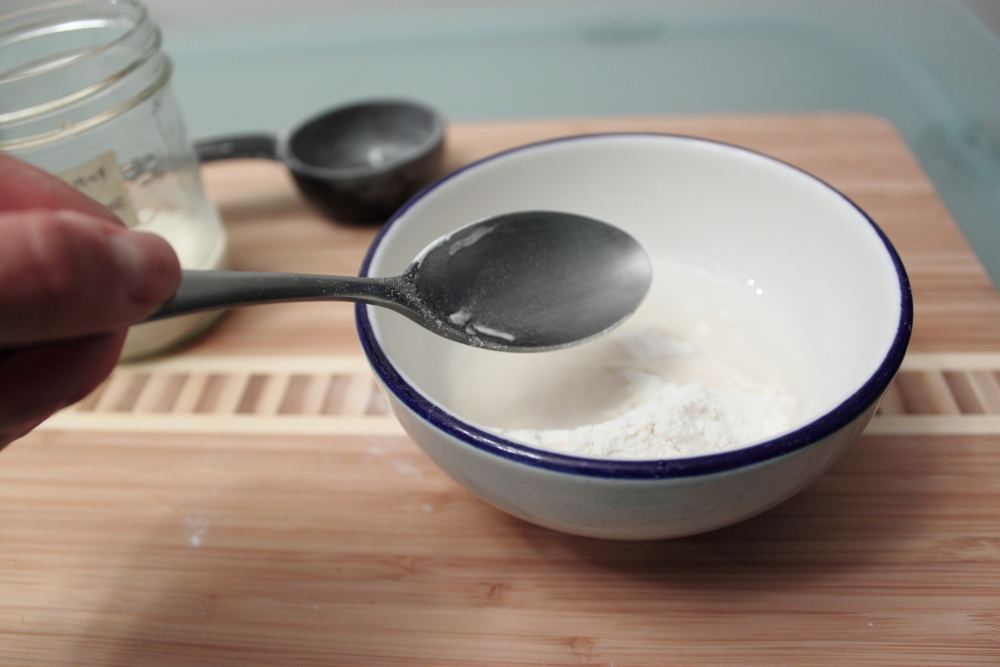

Make sure to put your starter in a glass container as it will bubble and grow. You don’t want to find a mess on your counter.


Once your starter has risen and its been 4-8 hours, you can mix more flour into your starter. Now that you have 1/2 cup of starter, you can feed your starter 1/2 flour with 6-8 tbsp water. The nice thing about feeding your starter is that you don’t have to be really accurate with the measurements. You can just dump flour and water directly into the starter and give it a stir. Leave the starter again for another 4-8 hours.

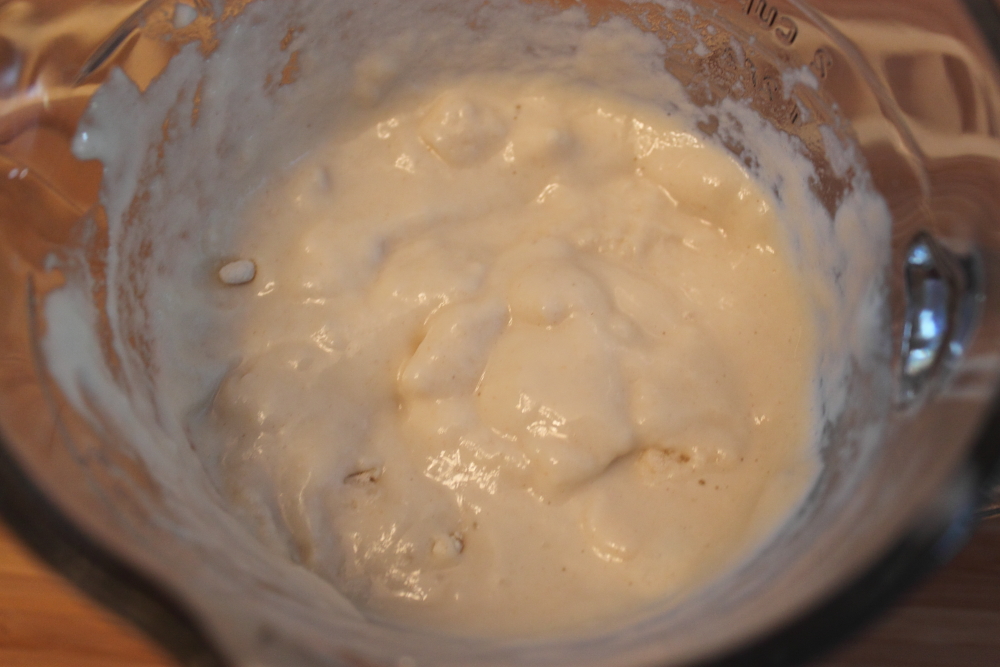
I did these steps over a couple of days and it does take patience. After a couple of hours, you can see bubbles and a bit of lactic acid on the top. I feel like I could have done another feeding because the starter didn’t rise as much as I thought.

After two feedings you should have about 1 cup of starter. You will need 3/4 cup of starter for the recipe. Save 1/4 cups of starter in the fridge for more sourdoughs.
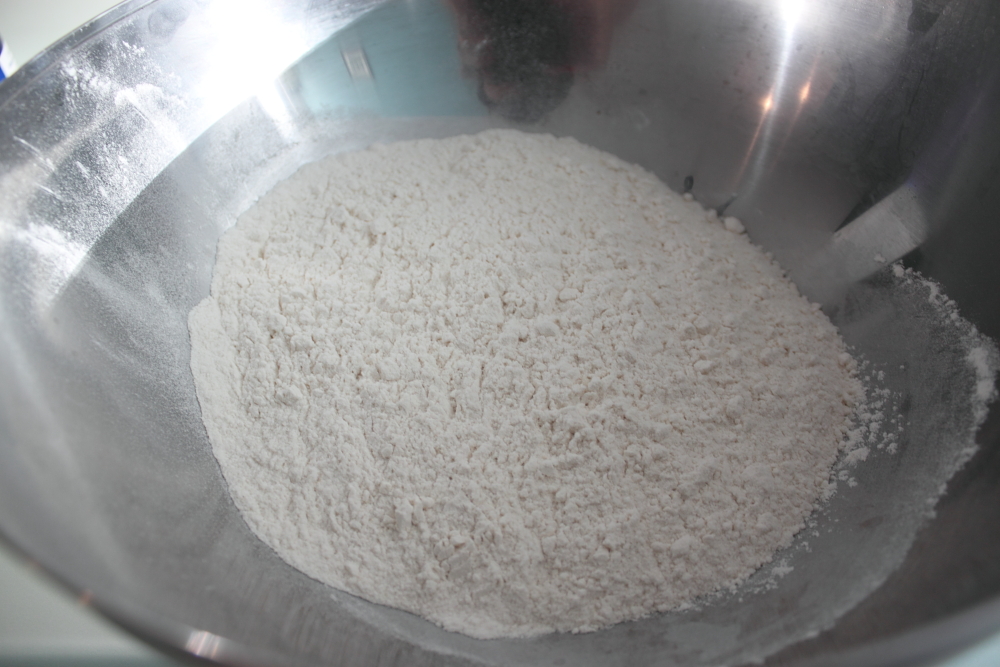
For this recipe, I used the American Kitchen No Knead Bread recipe that I was given by this volunteer. I noticed on this recipe that it uses bread yeast and water so I google a second recipe for reference by Nourished Kitchen (link below). I mixed bread flour and salt in a bowl. Use bread flour as it is wheat flour that contains more gluten and is ideal for the chewiness of artisan dough.

Add the 3/4 cups of starter. At this point, Nourished Kitchen says it should be a shaggy dough ball. I had no idea what that meant. I’ve made bread before and it looked very dry so I added some water. (At this point I was not sure if I was doing this correctly).

This was what it looked like before adding water. Is this the shaggy dough ball they wanted???

Once adding the water, the dough formed into a ball. Since it is a no knead dough recipe, you will need to let it rest for at least 18 hours. This will give the dough time to create the needed gluten.

Let the dough rest and make sure to cover it loosely with a tea towel or plastic wrap.

I left the dough rest all day. When I got home from work, it had expanded nicely and smelled wonderful.


It is time to knead the dough 10-15 times. The dough was really sticky so I added flour and kneaded till the dough was a ball. The dough needs to be rested another 2 hours. This time, place the dough on parchment paper so that it could go directly in the oven.


After rising for about 2 hours, you can score the top or leave it. I chose to leave it the way it was. Unfortunately, one thing I forgot to do was to pre-heat my La Creuset. This made my dough a lighter brown and no nice crust.

For my first no knead sourdough, I think it turned out ok.

Adapted from http://nourishedkitchen.com/no-knead-sourdough-bread and American Test Kitchen No Knead Dough
Ingredients
3cups unbleached flour
2/3 cups of sour dough starter
1 1/4 salt
Instructions
- Pour sourdough starter into a bowl with flour, salt and 1/2 cup filtered water. Mix with your hands to produce a shaggy dough. Cover the mixing bowl with plastic wrap and set it in a warm spot in your kitchen for twelve hours.
- After twelve hours, scoop the dough from the bottom of the bowl and fold it over on itself twice. Allow it to continue to rise for a further two to four hours, or until doubled in bulk.
- Flour your hands and your counter top. Plop the dough onto your floured working surface and gently shape it into a boule or a torpedo as it suits you. Keep in mind that the less you handle your dough, the better your loaf will be. Allow the dough to rise until doubled in bulk, about two hours.
- Set as cast iron pan onto the bottom level of your oven and a baking stone on the middle level of your oven. Preheat the oven to 450 F.
- Once the oven is preheated, bring one cup water to boil on the stove.
- Sprinkle the preheated baking stone with semolina or corn meal. Gently place your bread on the baking stone. Pour boiling water in the cast iron pan on the bottom wrack. Shut the door to the oven fast and bake for 45 minutes.
- Allow the bread to cool completely before slicing and serving
Check out other recipes on our blog https://eatitnoworeatitlater.com/recipe-list/


One Comment Add yours