I’ve always been fascinated with baking and one of the things I love to bake is bread. Bread is so versatile. It can sweet or savoury, filled with stuff or just by itself. The bread recipe I decided to make was from the Company’s Coming Bread cookbook. I chose ‘soft buns’ from this recipe book because I’ve made it before and it doesn’t take a long time. Be careful when choosing a bread recipe. Some recipes can take hours or even overnight so read your recipes ahead of time!!! I have learned the hard way.

Before starting, check to make sure you have all the ingredients. The one ingredient you have to make sure is fresh is baker’s yeast. I’ve also learned this hard way. Old yeast doesn’t rise so your bread isn’t as fluffy. I really like the small packages they sell now. No measuring and each one is sealed.

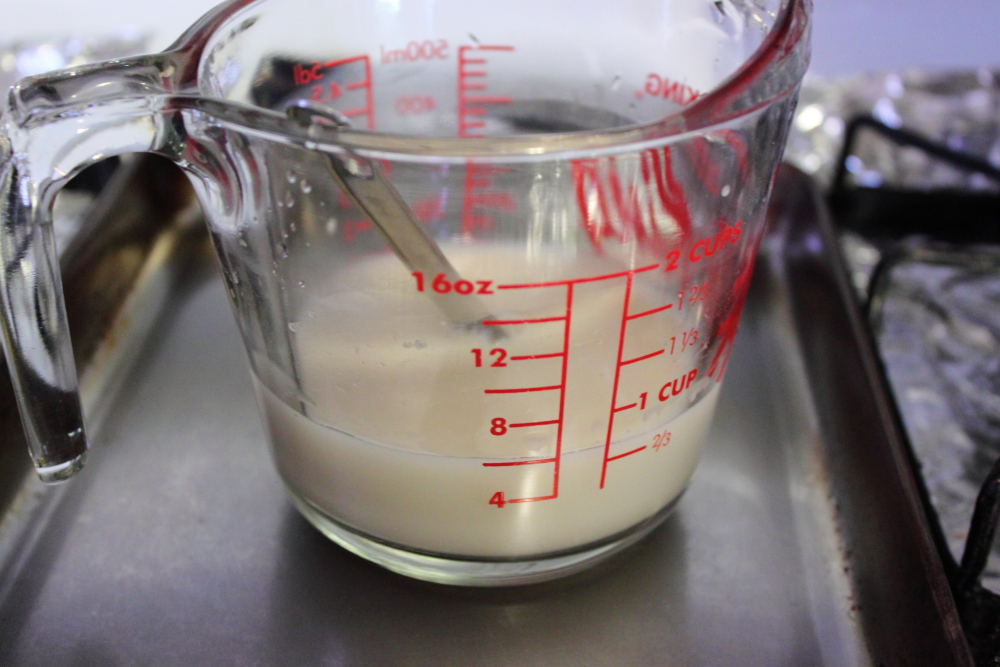
One thing to watch for when buying baking yeast is if it instant yeast or the regular traditional yeast. Both work but there is a difference between their use. You can use instant yeast right out of the package and in your recipe dry without letting it rise or mixing it with water. Traditional yeast needs to be mix with water and sugar and then left to rise. Why let it rise? Yeast are tiny organisms that produce carbon dioxide and ethanol. They make the tiny air pockets that are found in bread!! To get these organisms growing all you need is warm water (not to hot!), some sugar and a little bit of love (you can also sing to it if you like). I also like to keep it on a warm oven to help it grow. Notice in the picture below, you can see all the carbon dioxide produced by the yeast.

Once the yeast is ready (it should be about 10 minutes), you’re ready to continue. This recipe uses warm milk, warm water and room temperature eggs. The recipe also uses white flour but I like to add a bit of whole wheat (I substituted 2 cups of white flour with 2 cups of whole wheat). Depending on the weather, the flour can be too dry so I always add less flour than the recipe asks. You can always add more while kneading the dough but you can’t take it out.

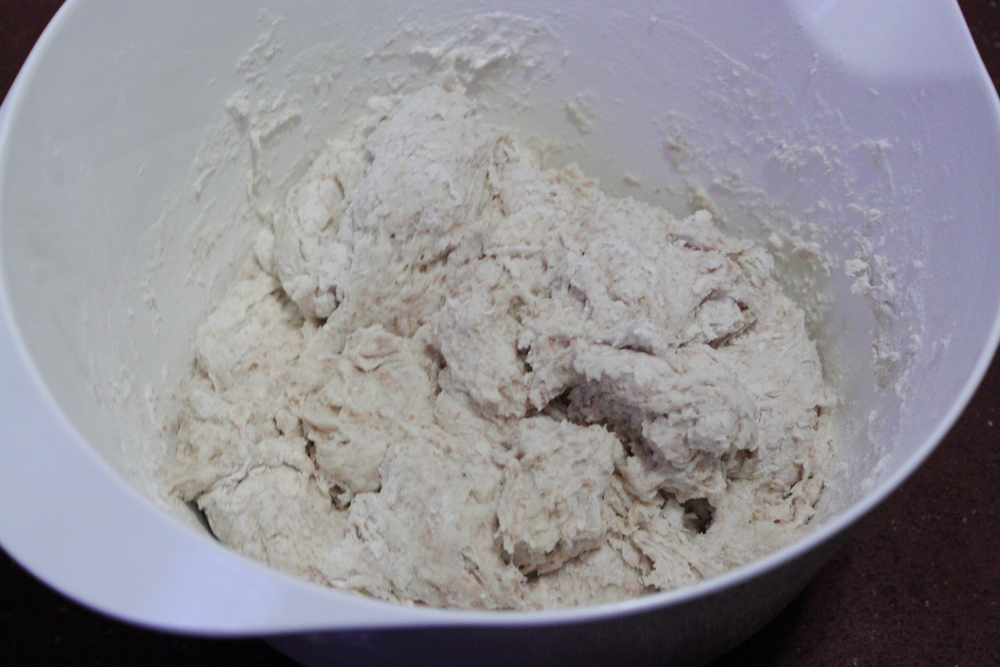
Now that all the ingredients are mixed together its time for the best part of making bread! The kneading!!! Kneading helps to make gluten strands which help make that bread texture everyone is familiar with. I like to knead the dough with my hand even though I own a KitchenAid. I love the process and you get to feel when the dough is ready. Recipes for bread always say knead the dough until smooth and elastic. They never really tell you what that looks or feels like and its hard to explain if you’ve never seen or made bread before. I’m lucky I have a family who loves to cook and bake. I learned at an early age on how to tell when dough was ready (pressing your thumb on the surface of the dough and watching it spring back). Its a technique that my aunt taught me and its better taught in person than reading it online. If in doubt, kneading for about 8-10 minutes is a good time estimate and if your still unsure, knead some more!
Once your dough is nice and elastic, form it into ball and coat it in some oil. This will help it from drying it out. I also like to cover it with a tea towel. Stick the whole thing in a warm oven and wait! Thats right its the waiting game now.

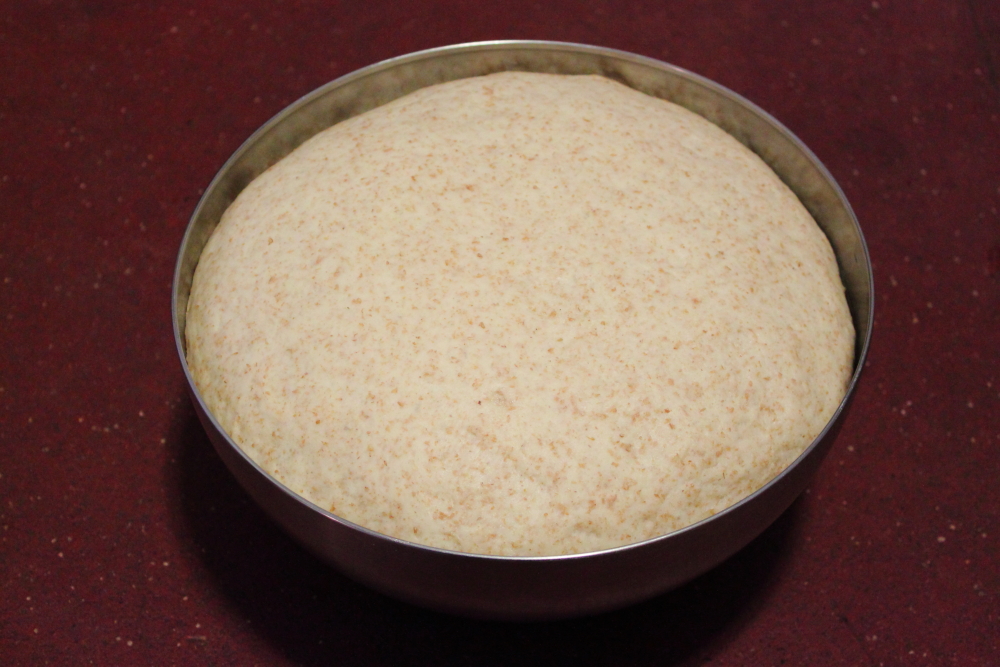
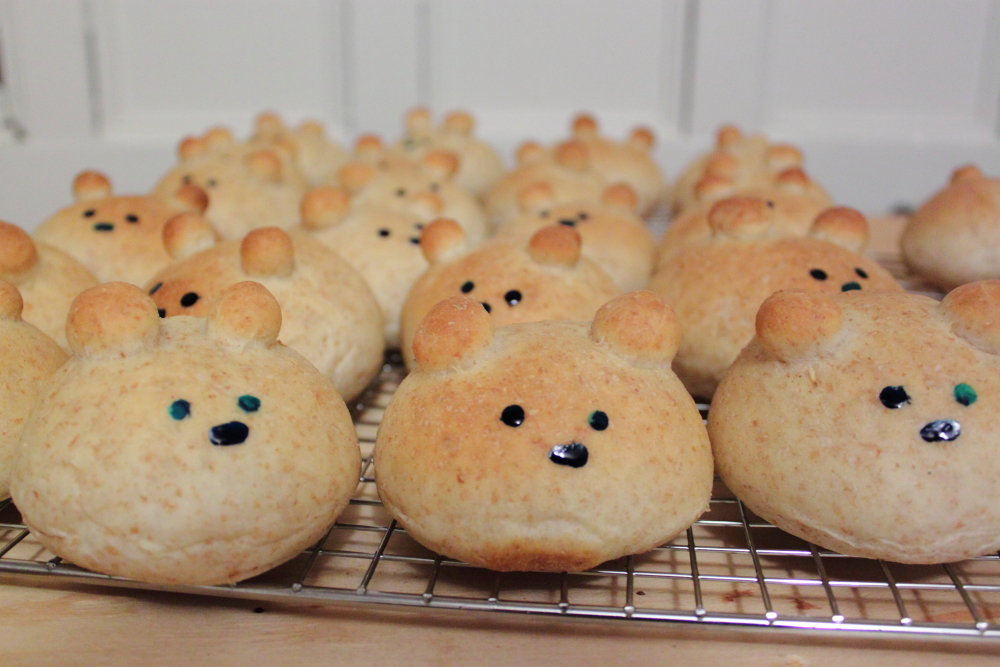
After waiting and waiting and waiting and waiting… for about an hour and a half, the dough is double in size and really soft and fluffy. Here comes the fun part!! Making the buns. Not just any buns but bear shaped buns. I thought it would be cute to have buns in the shape of bear heads! Divide the dough into 30 balls leaving some dough for the ears. The ears are two tiny rolled balls of dough.


Most bread recipes involve rising the bread twice. Its time to let the bear buns rest again. This time for just 45 minutes. Notice how the bears are nice and fat now.

Time to bake the bears and make the house smell like a bakery.
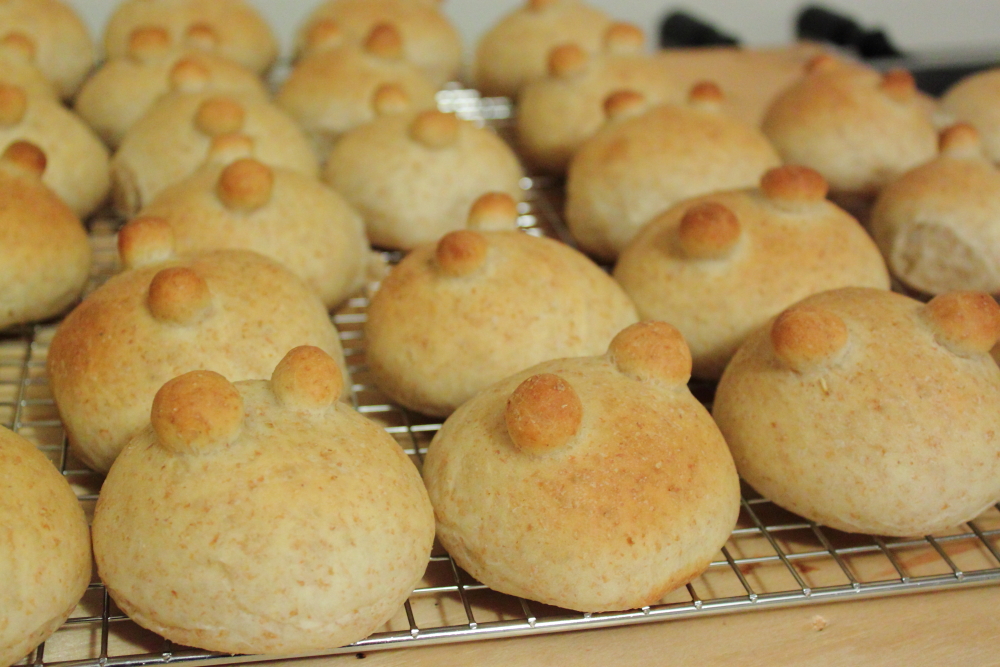
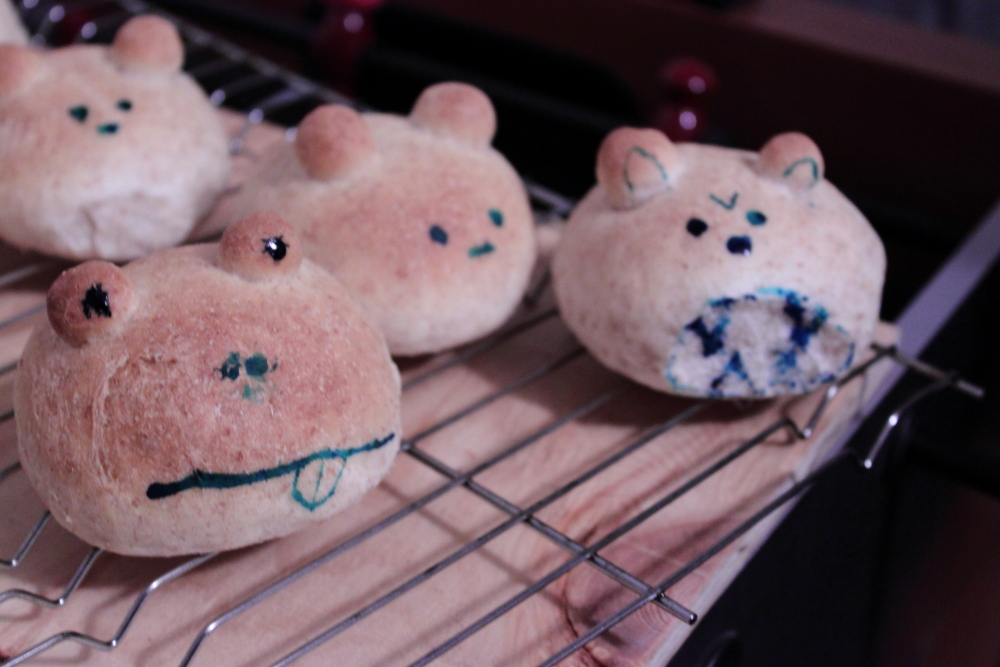
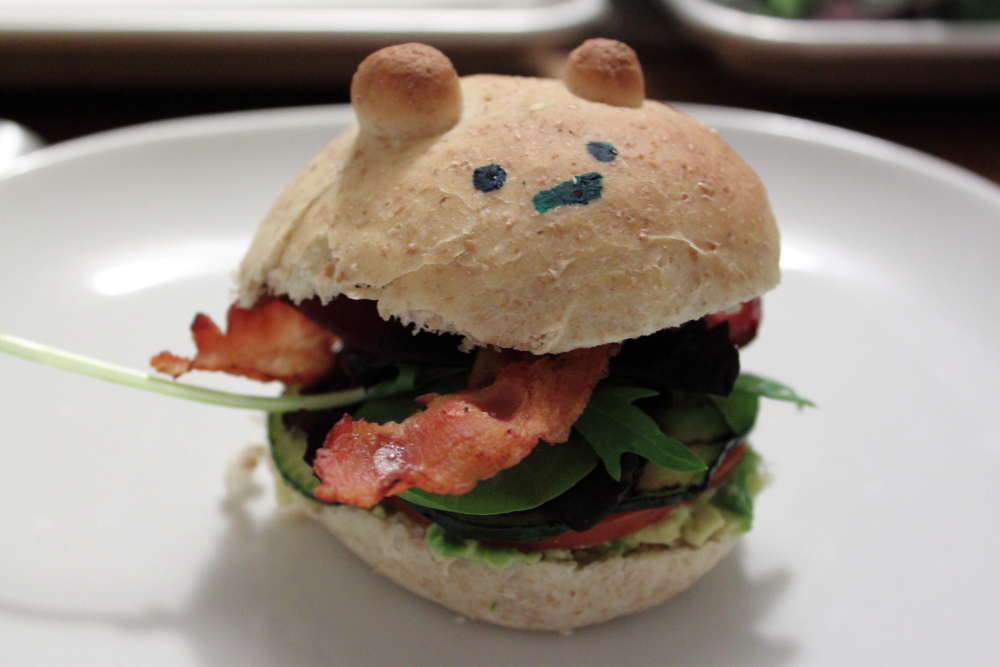
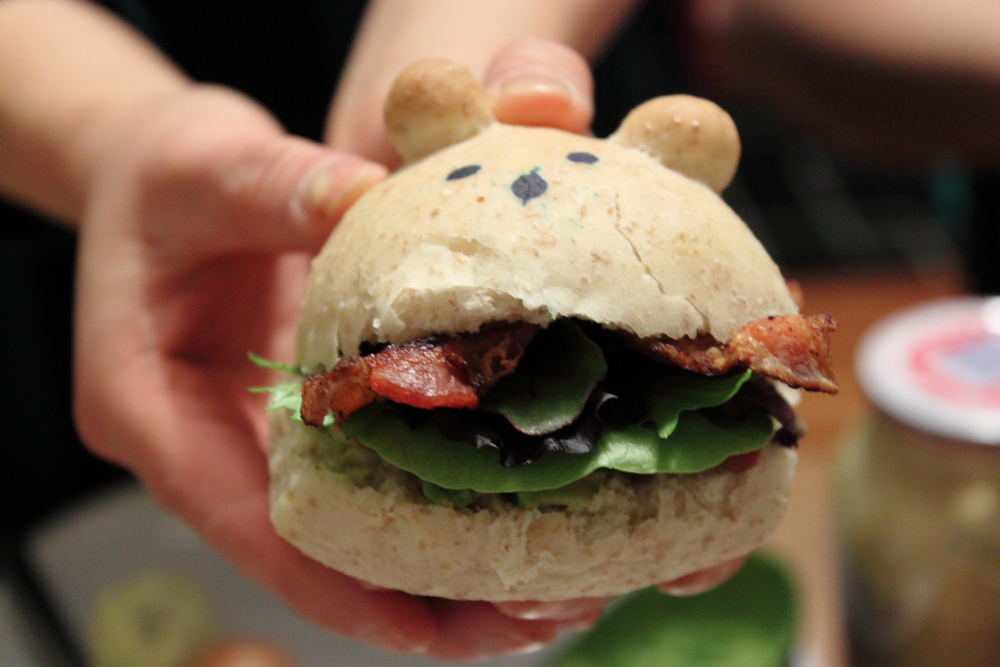
They don’t look like bears just yet. All you need is a little food colouring, the back of a skewer and a bit of creativity.
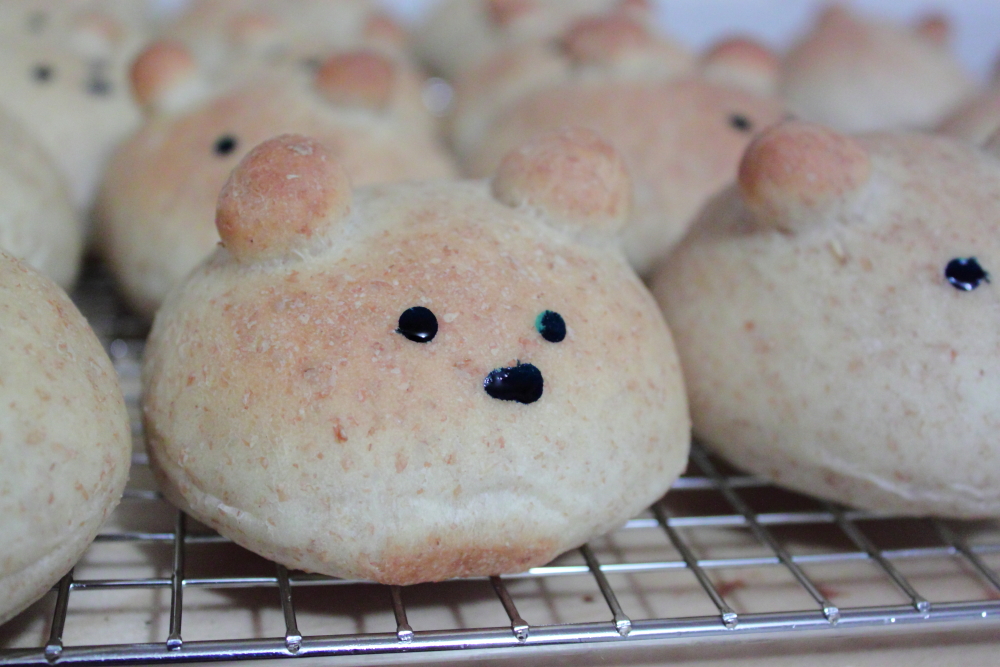
But maybe not too much…
The great thing about these buns is that they will make you smile. You can have them in the morning when you wake up on the wrong side of bed.
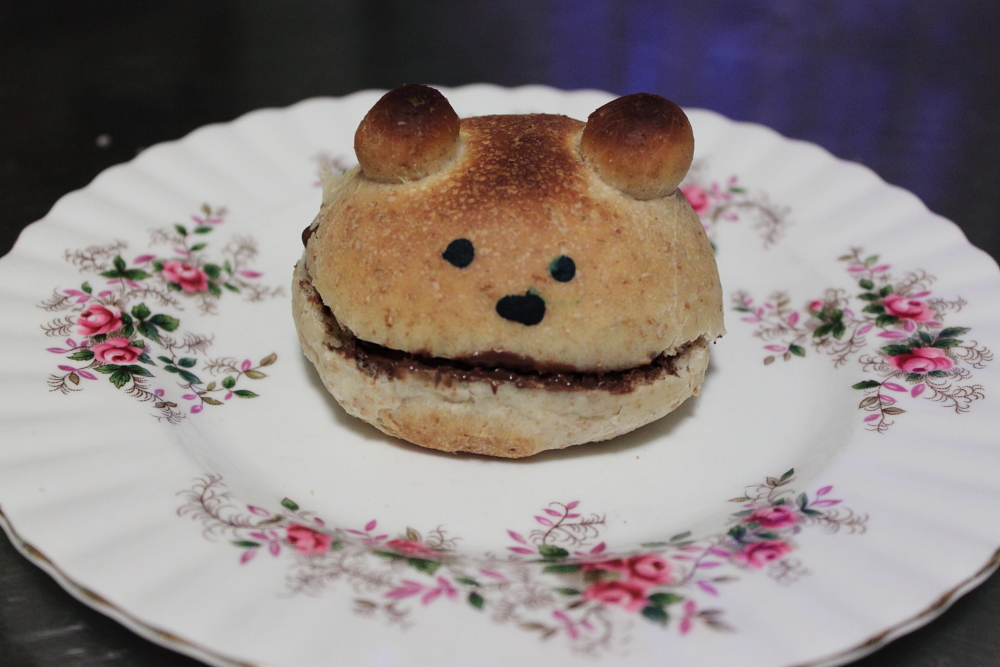
Or for dinner after a long day at work.
Check out other recipes on our blog https://eatitnoworeatitlater.com/recipe-list/


Love these! Have got to try them for the kids lunch boxes 🙂